The Keurig K40 Elite Brewer is a single-serve coffee maker designed for convenience and efficiency. It uses K-Cup pods, offering customizable brew sizes and flavors. With a user-friendly interface and quick brewing time, it’s ideal for home or office use. This model balances affordability with essential features, making it a popular choice for coffee enthusiasts seeking a hassle-free experience.

1.1. Overview of the Keurig K40 Elite Brewer
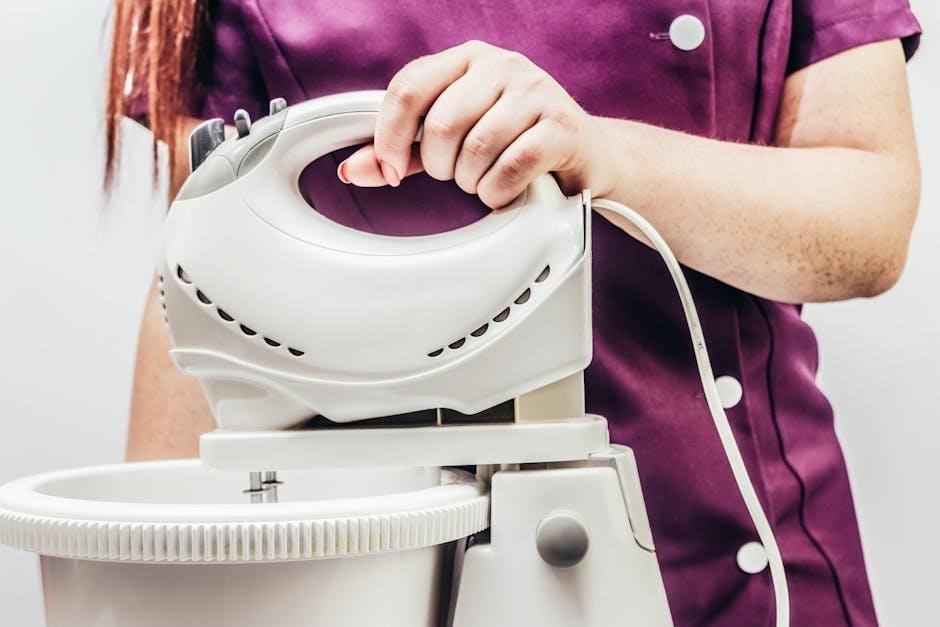
The Keurig K40 Elite Brewer is a versatile single-serve coffee maker designed for home and office use. It supports three brew sizes (6, 8, and 10 ounces) and works with various K-Cup pods for coffee, tea, or hot chocolate. Packed with features like a programmable auto-off timer and a 48-ounce water reservoir, it offers convenience and efficiency. The removable drip tray simplifies cleanup, while its compact design and intuitive controls make it ideal for those seeking a straightforward coffee experience. This brewer balances functionality and ease of use, catering to a wide range of coffee preferences and lifestyles.
1.2. Key Features and Benefits
The Keurig K40 Elite Brewer offers a range of features designed to enhance your coffee experience. With three brew size options (6, 8, and 10 ounces), it allows customization to suit your preferences. The programmable auto-off timer saves energy and ensures the machine turns off after use. The 48-ounce water reservoir minimizes refills, while the removable drip tray accommodates travel mugs. Its compatibility with over 400 K-Cup varieties provides endless flavor options. The intuitive controls and quick brewing time (under one minute) make it perfect for busy individuals. Additionally, the brewer’s compact design fits seamlessly into any kitchen, making it both practical and efficient.

Important Safety Precautions
Always read the manual before use. Avoid touching hot surfaces and keep children away. Use genuine Keurig parts and follow electrical safety guidelines to prevent hazards.
2.1. General Safety Guidelines

Before using the Keurig K40 Elite Brewer, read the manual thoroughly. Always keep children away from the machine and avoid touching hot surfaces. Ensure the brewer is placed on a stable, heat-resistant surface. Never submerge the machine in water or use it near flammable materials. Use only Keurig-approved K-Cup pods and accessories to maintain safety and performance. Avoid overloading the machine or using damaged cords. Keep the power cord away from hot surfaces and avoid using adapters. Regularly inspect the brewer for damage and stop use if any issues arise. Follow all safety warnings to prevent burns, electrical shocks, or mechanical failures.
2.2; Electrical Safety and Appliance Handling
Always use the Keurig K40 Elite Brewer with a properly grounded electrical outlet rated for 120V AC. Avoid using damaged cords or loose connections, as they may cause electrical shocks. Never expose the brewer to water or moisture, as this can lead to malfunction or injury. Keep the power cord away from hot surfaces and avoid pinching or tangling it. Do not use adapters or extension cords, as they may overload the circuit. Ensure proper ventilation around the machine to prevent overheating. If you notice any electrical issues, unplug the brewer immediately and consult a qualified electrician. Always handle the brewer and its components with care to prevent damage or exposure to live electrical parts.
First-Time Setup and Installation
Unpack the Keurig K40 Elite Brewer and inspect for damage. Place it on a flat, stable surface, ensuring proper ventilation. Plug the power cord into a grounded 120V outlet. Follow the initial setup instructions to prime the water reservoir and prepare the brewer for first use.
3.1. Unpacking and Initial Preparation
Begin by carefully unpacking the Keurig K40 Elite Brewer from its box. Ensure all components, including the brewer, power cord, drip tray, and K-Cup holder, are included and undamaged. Rinse the water reservoir thoroughly with fresh water before filling it. Wash the drip tray and K-Cup holder with mild soap and warm water to ensure cleanliness. Place the brewer on a stable, flat surface, away from direct sunlight and heat sources. Plug in the power cord, but avoid turning it on until the initial setup is complete. Refer to the manual for specific unpacking instructions to ensure proper preparation for first use.
3.2. Plugging In and Powering On the Brewer
Locate a nearby electrical outlet and plug in the Keurig K40 Elite Brewer. Ensure the outlet is grounded and rated for the brewer’s power requirements. Once plugged in, press the Power button located on the upper right panel. The green Power Light will illuminate, indicating the brewer is on. Allow the machine to complete its initial startup cycle, which may take a few moments. During this time, the Add Water indicator will flash blue, signaling that the brewer is ready for water to be added. Follow on-screen prompts or refer to the manual for guidance on completing the setup process. After powering on, the brewer will be ready to begin its first use. Always ensure the brewer is properly plugged in before use to avoid any malfunctions or safety issues.
Brewing Your First Cup
Insert a K-Cup pod, select your brew size, and press Brew. The machine will preheat and prepare your coffee, ensuring a fresh and flavorful cup every time.
4.1. Understanding the Controls and Indicators
The Keurig K40 Elite Brewer features intuitive controls, including a power button, brew size options, and indicator lights. The Power Button turns the machine on/off, while the Brew Size buttons allow you to choose between 8 oz and 10 oz cups. The Add Water Indicator lights up when the water reservoir is low, and the Heating Indicator shows when the machine is preheating. The Brew Button starts the brewing process once a K-Cup is inserted. Familiarizing yourself with these controls ensures a seamless brewing experience. Always refer to the manual for detailed guidance on using these features effectively.
4.2. Step-by-Step Brewing Instructions
To brew a perfect cup with the Keurig K40 Elite Brewer, follow these steps:
Plug in the brewer and ensure it is powered on.
Fill the water reservoir with fresh, filtered water.
Allow the machine to preheat until the Heating Indicator stops flashing.
Lift the handle and insert a K-Cup pod into the holder.
Close the lid firmly to ensure proper alignment.
Select your preferred brew size using the Brew Size button.
Place a mug under the spout.
Press the Brew Button to start the brewing process.
Wait for the cycle to complete and enjoy your coffee.
Always ensure the machine is ready and the water reservoir is filled before brewing for optimal results.
Maintenance and Cleaning
Regular cleaning and descaling are essential to maintain the Keurig K40 Elite Brewer’s performance. Daily wipe-downs and emptying the drip tray prevent residue buildup. Descaling every 3-6 months removes mineral deposits, ensuring optimal function and taste. Follow the manual’s deep cleaning guide for thorough maintenance.
5;1. Daily Cleaning and Hygiene Practices
Regular daily cleaning ensures your Keurig K40 Elite Brewer operates efficiently and remains hygienic. After each use, wipe the brew head, K-Cup holder, and drip tray with a damp cloth to remove coffee residue. Empty the drip tray regularly to prevent overflow and clean it with mild soap and warm water. Rinse the water reservoir weekly and refill with fresh water. Avoid using abrasive cleaners or scrubbers, as they may damage surfaces. Descale the brewer every 3-6 months to remove mineral buildup. Proper hygiene practices prevent bacteria growth and maintain optimal flavor. Follow these steps to keep your brewer in excellent condition.

5.2. Descaling and Deep Cleaning Procedures
Descaling and deep cleaning are crucial for maintaining your Keurig K40 Elite Brewer’s performance and longevity; Start by descaling every 3-6 months to remove mineral buildup. Use a Keurig-approved descaling solution or white vinegar. Pour the solution into the water reservoir, then run brewing cycles without a K-Cup until the reservoir is empty. Rinse thoroughly by running 2-3 cycles with fresh water to eliminate any lingering taste. For deep cleaning, soak removable parts like the K-Cup holder and drip tray in warm soapy water. Use a soft brush to remove stubborn debris from the brew head. Regular descaling and deep cleaning ensure optimal functionality and prevent any buildup that could affect taste or efficiency.

Troubleshooting Common Issues
This section addresses frequent problems with the Keurig K40 Elite Brewer, such as poor brewing performance, leaks, or error lights. Follow diagnostic steps to resolve issues efficiently.
6.1. Identifying and Resolving Brew Issues
Common brew issues with the Keurig K40 Elite Brewer include weak or no coffee flow, improper K-Cup pod recognition, or inconsistent brew temperature. To resolve these, first check for blockages in the K-Cup holder or needles. Clean the needle with a paper clip to remove debris. If the machine displays a “descale” warning, mineral buildup is likely; run a descaling cycle using a Keurig-approved solution. For power issues, unplug the brewer, wait 30 seconds, and restart. If problems persist, ensure the water reservoir is properly aligned and filled. Regular maintenance and cleaning can prevent many of these issues from occurring.
6.2. Diagnosing and Fixing Machine Malfunctions
If the Keurig K40 Elite Brewer malfunctions, start by unplugging it and waiting 30 seconds before restarting. Check for power issues, ensuring the cord is securely connected and the outlet is functioning. For mechanical issues, inspect the K-Cup holder and needles for blockages or debris. Clean or replace these parts if necessary. If the brewer displays error lights or messages, consult the manual for specific troubleshooting steps. For persistent problems, perform a factory reset by pressing and holding the “Small Cup” and “Large Cup” buttons simultaneously while powering on. If issues remain unresolved, contact Keurig customer support or consider professional repair.

Warranty and Customer Support
The Keurig K40 Elite Brewer is backed by a one-year limited warranty. For any inquiries or issues, contact Keurig’s customer support team via phone, email, or their official website.
7.1. Understanding Your Warranty Coverage
The Keurig K40 Elite Brewer is protected by a one-year limited warranty, which covers defects in materials and workmanship under normal use. This warranty applies to the original purchaser and is non-transferable. It does not cover damage resulting from misuse, accidents, or unauthorized modifications. For warranty claims, contact Keurig Customer Service with proof of purchase. They will guide you through the repair or replacement process. For more details, refer to the warranty section in your user manual or visit Keurig’s official website. Understanding your warranty ensures you can address any issues promptly and maintain your brewer’s performance.
7.2. Contacting Keurig Customer Service
For assistance with your Keurig K40 Elite Brewer, contact Keurig Customer Service through their official website, phone, or email. Visit the support section on their website for FAQs, troubleshooting guides, and a contact form. You can also call their toll-free number at 1-866-901-7878 for direct support. Additionally, email inquiries can be sent to customerservice@keurig.com. Ensure to provide your product serial number and details of your issue for faster resolution. Their team is available to address warranty claims, repair requests, and general inquiries. For the best experience, visit their website, as it uses cookies to enhance functionality and user experience.